g+1

Showing posts with label photoshop cs5. Show all posts

Wednesday, 10 August 2011

Random Re-touching

There are countless ways to enhance/retouch a photo, ranging from correcting colour casts to completely reshaping a chosen subject from an image, of course, not all images need the full shabang so to speak and some clients may not want certain things doing.
Photo Enhancement is a preference thing, I prefer the more natural retouching.

For this tutorial I'll be using the photo found below, taken by a friend of mine.
http://www.flickr.com/photos/jwaphotography/5832805138/sizes/l/in/photostream/

+57 Saturation
First I add a Hue and Saturation adjustment layer..
Before
After


Next, I select the Dodge tool. The Dodge tool lightens the selected pixels and the Burn tool lightens the selected pixels, Always be cautious using these tools as over-use can cause image degradation.
Dodge tool selected

Dodge tool  settings.


To avoid image degradation and to maintain the natural look of the photo, I only use the dodge tool a small amount, to lighten the shadows.

Post Dodge

Next, I select the Spot Healing tool, The key to using  the spot healing tool is Brush size, I adjust the brush size using the keys '[' for down and ']' for brush size up and ensure that the brush size covers the spot that needs removing.
This tool is extremely powerful and can clear up skin in no time, as long as you stay away from eyes and other  highly detailed areas.
Before spot heal


After spot heal

As  you can see, the skin appears much clearer post spot healing.

Next, I duplicate the layer by right clicking on the layer and clicking 'duplicate layer', on the new duplicate layer I apply some surface blur by going to filter->blur->surface blur.

Surface blur

Note that the pixel radius and threshold change the blur of the photo, I choose to apply a lot of blur and then control the effect through the opacity options.
Using a mask (if you don't know what masking is, see my tutorial here) I hide the details I wish to remain clear from the blur, eyes, mouth and hair in this case however some photos look better with the clothes un-blurred too however I like the look for this particular image.
Blur applied


Next, I change the layer opacity, the lower the opacity, the less the effect of the blur layer. For this image i used 37%


There are more things I could of done such as white out the background but for now, I'm going to stop here.


retouched image
Original image


If you would like specific topics covered, leave feedback :)

Tutorial by The Photoshop Sensei


Tuesday, 9 August 2011

Changing a background

First, I select what subject, in this case the horse and rider.
If you want to learn how, see my Selection tutorial here

Selection made using quick mask

Cut the image, using Ctrl+X, then I find a suitable background.

Once I am happy with a background image I paste the previously cut subject onto the background image using CTRL+V, note that the image looks un-natural due to the size, angle and jagged cutting out, so I fix it..

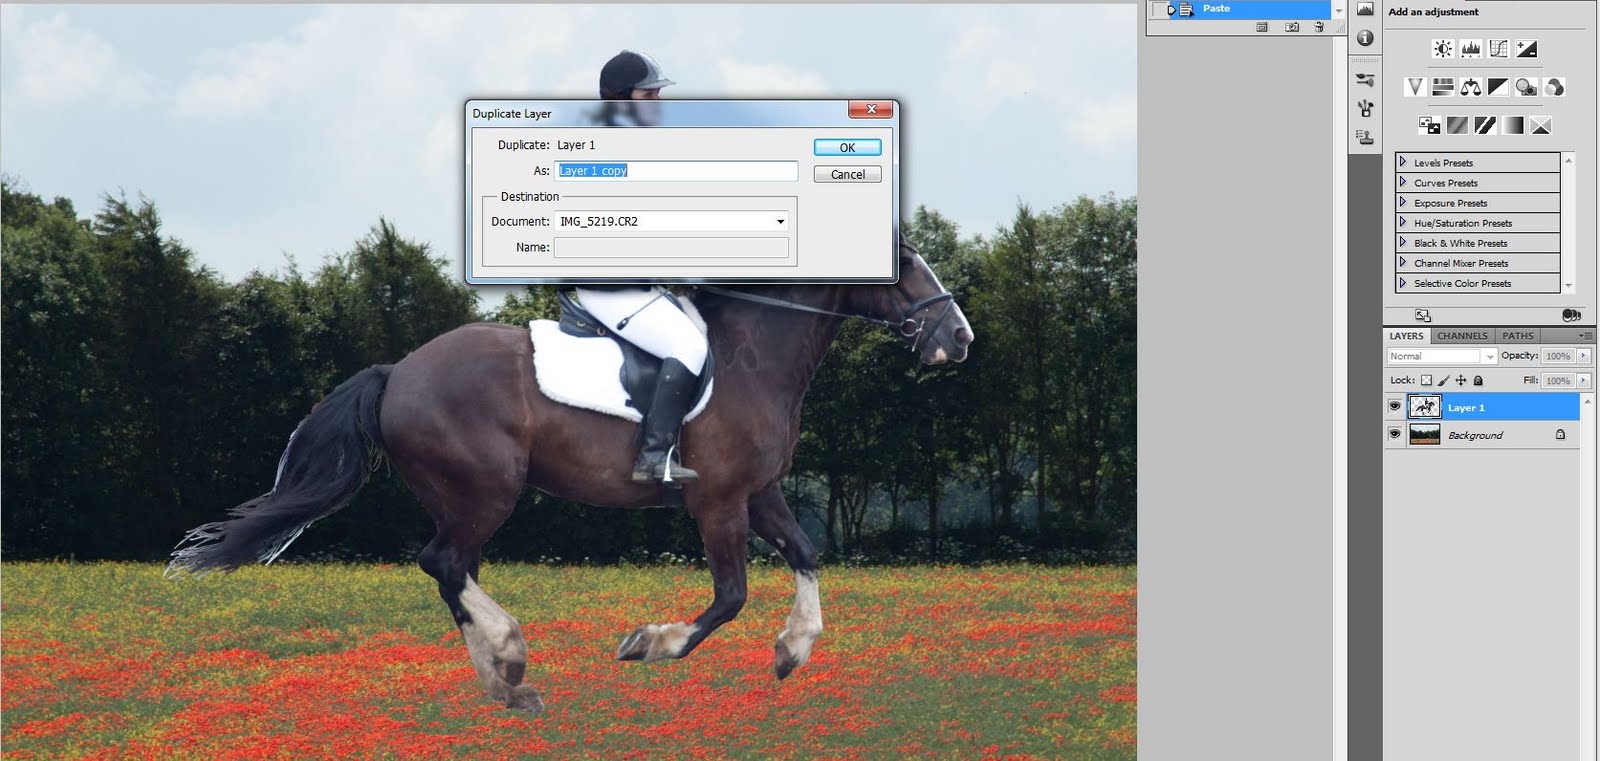
But first I duplicate the Layer with the pasted subject on for later use, for now I make the layer invisible.


I then go to edit -> free transform of CTRL+T, I grab the corner to resize the subject (hold shift to maintain the correct scale)

Next I right click and choose 'Perspective' and drag the top inwards to change the perspective of the subject.


I'm now going to smooth the edges, one way to do this is by applying gaussian blur however my preferred method is to use a soft brush to mask the edges of the subject.
I apply a mask instead of deleting because you never know when you are going to need the information which gets deleted when using the erase tool, instead I apply a mask, which can always be edited (until applied atleast)


Burn tool icon
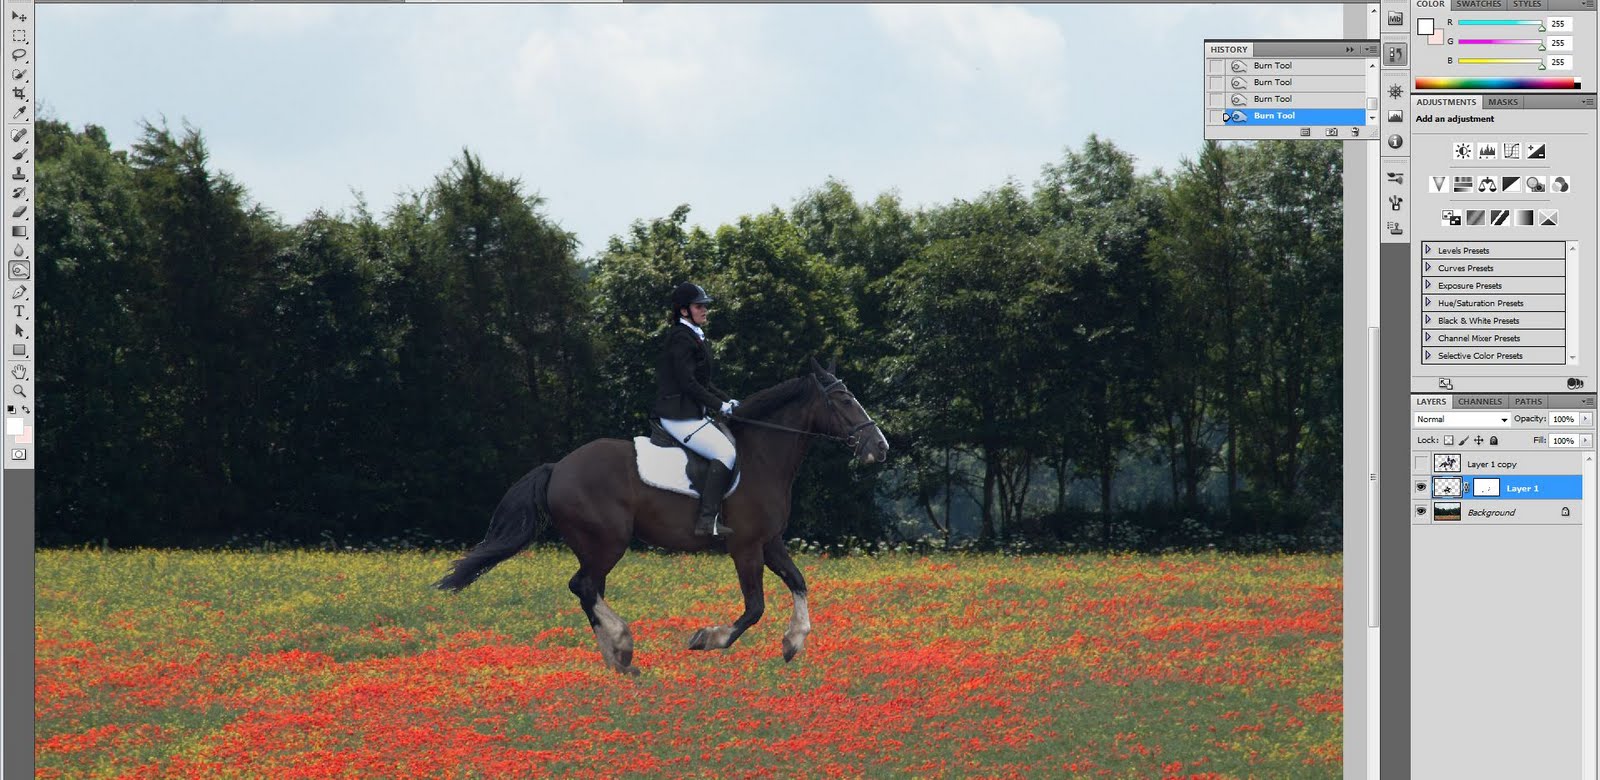
Next I use the Burn tool to make the subject look natural, what I mean is so that the whole image appears to be lit by the same light source, in this case it is the Sun.


More natural lighting - using the Burn tool
Note that I currently have the subjects layer selected (common mishap)
Also note that if the Lighting matches up, or you prefer not to adjust the lighting then skip this step.

.
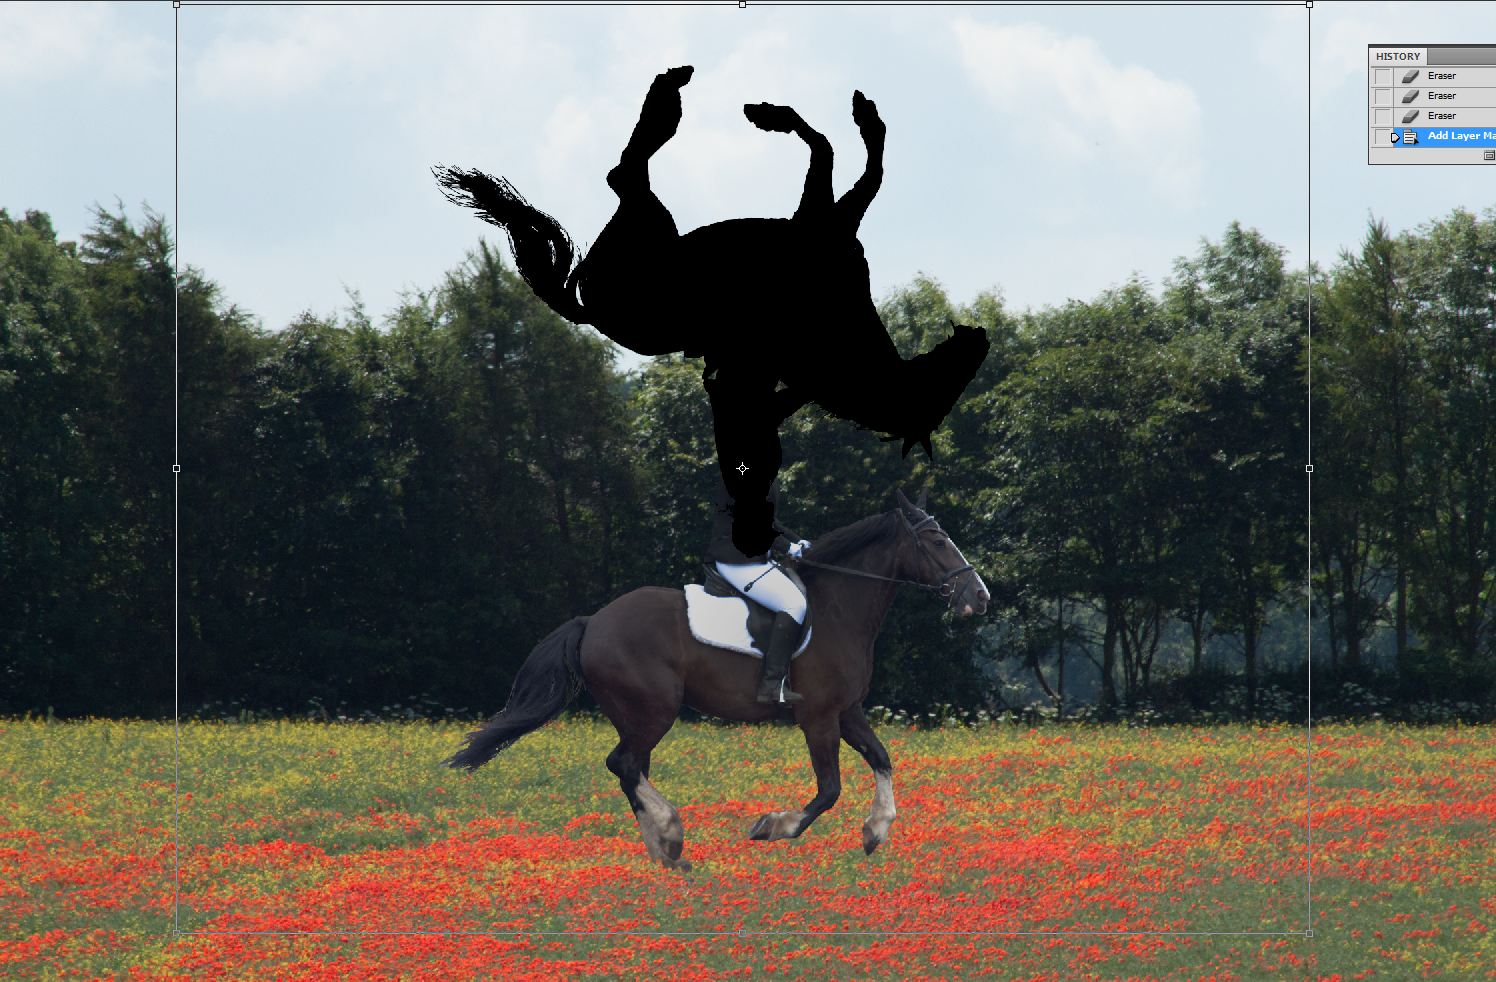
So, back to the Duplicate layer, turn the visibility back on, Click the layer whilst holding CTRL to select the image outline, then Edit->fill, choose 'Black' from the drop down menu.


Next I go to Edit->free transform and scale the black filled subject to about the size of the actual subject as this will be the shadow.

Next I flip the layer, Whilst in Free-transform, Right click->flip vertical  and the image looks like this..


Next, I drag the shadow to where I want to position it, in this case the near side.

I then Right click and select the warp tool. I then drag and warp the shadow to look more realistic.
The goal of this is to connect  the shadows feet to the subjects feet, to make it look realistic.

Next I change the Layer opacity from 100% to make the shadow look realistic, for this I chose 28% but its all down to preference/other shadows in the image.


Final image:


Happy Background swapping!
Keys to success -
Patience is the key whilst selecting the subject to cut out.
Subtlety = Realistic


Tutorial brought to you by The Photoshop Sensei